

Cloud Deployment: Hosting a Website on Docker, Kubernetes


Task 1: Setting up Docker Environment
Used AWS EC2 Ubuntu based instance as a guest machine to perform all these tasks.
· To install docker
sudo apt-get update
sudo apt-get install docker.io
sudo chown $USER /var/run/docker.sock
· To create Dokcerfile
vim Dockerfile
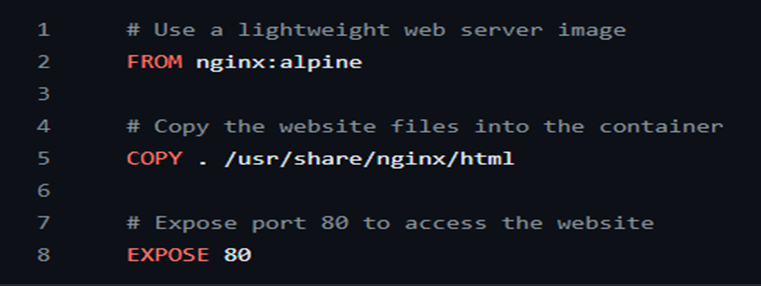
Dockerfile Fig 1
Task 2: Dockerizing the Website
· Used a simple static website and pushed to my github repositories. Here is github URL
https://github.com/ShivamKumar14/Hosting-a-Website-on-Docker-Kubernetes-and-Creating-a-REST-API-on-API-Gateway.git
· Build image from dockerfile
sudo docker build -t website .
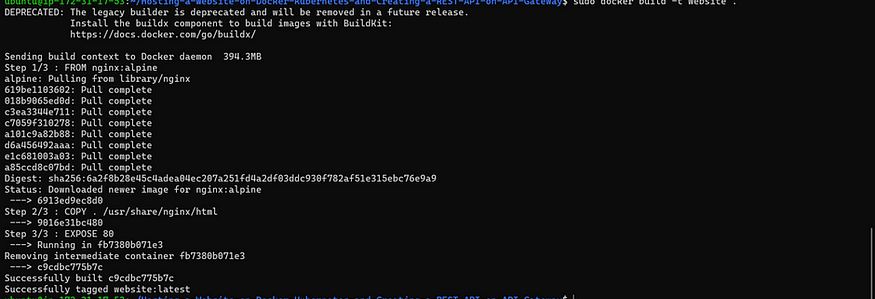
Build Complete Fig 2.1
Configure 8080 port in security groups inbound rule before testing docker image
· Test the docker image
sudo docker run -d -p 8080:80 website

Website is running Fig 2.2
Task 3: Setting up Kubernetes Cluster
· Utilized AWS ECR to push and store docker image

Amazon ECR Fig 3.1
Here are the push commands for the repository.
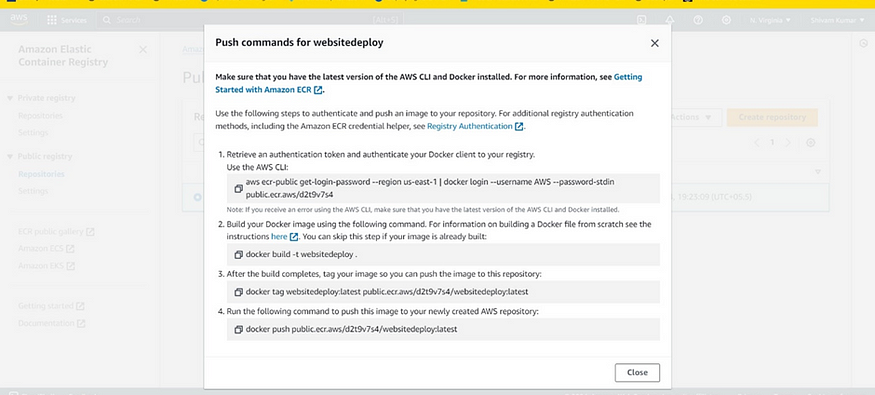
Push Commands Fig 3.2
- IAM Configuration
Created a user with AdministratorAccess.
Generate Security Credentials: Access Key and Secret Access Key.
- Install AWS CLI
curl “awscli.amazonaws.com/awscli-exe-linux-x86_6.." -o “awscliv2.zip”
sudo apt install unzip unzip awscliv2.zip
sudo ./aws/install -i /usr/local/aws-cli -b /usr/local/bin — update
aws configure

Aws login Fig 3.3
- Install kubectl
curl -o kubectl amazon-eks.s3.us-west-2.amazonaws.com/1.19...
chmod +x ./kubectl
sudo mv ./kubectl /usr/local/bin
kubectl version — short –client
- Install eksctl
curl — silent — location “github.com/weaveworks/eksctl/releases/lates.. -s)_amd64.tar.gz” | tar xz -C /tmp
sudo mv /tmp/eksctl /usr/local/bin
eksctl version
- Now setup EKS cluster
eksctl create cluster — name shivam-cluster — region us-west-2 — node-type t2.micro — nodes-min 2 — nodes-max 2
aws eks update-kubeconfig — region us-west-2 — name shivam-cluster
kubectl get nodes
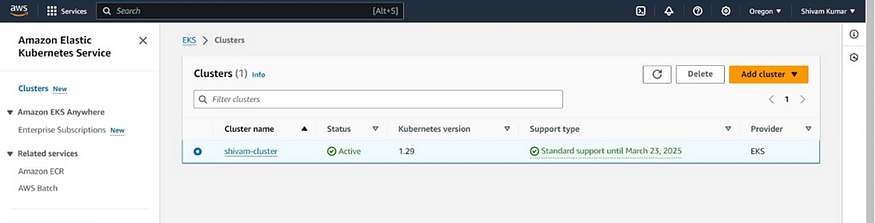
EKS Cluster Fig 3.4

Nodes as configured Fig 3.5

Setting up of EKS Cluster from CloudFormation Viewpoint Fig 3.6
Task 4: Deploying Website on Kubernetes
Created Kubernetes deployment and service manifests to deploy the Dockerized website onto the Kubernetes cluster.
vim deployment.yaml
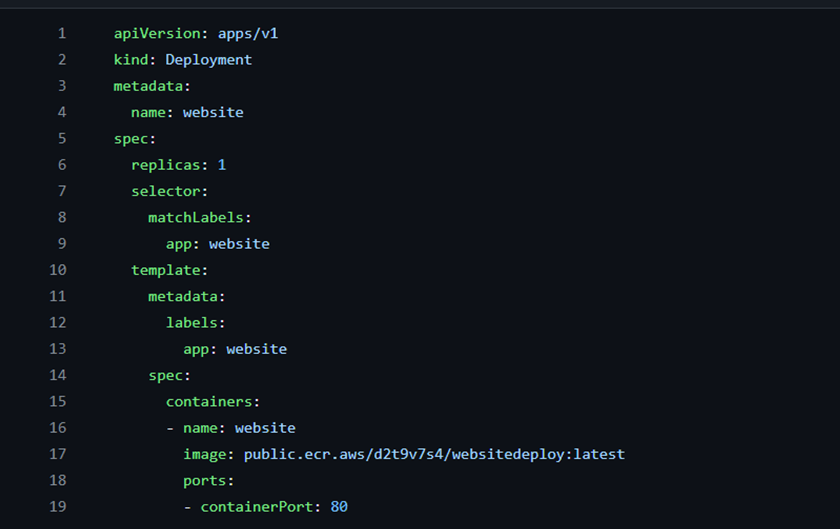
Deployment.yaml file Fig 4.1
vim service.yaml

Service file Fig 4.2
Deploying the website.
kubectl apply -f deployment.yaml
kubectl apply -f service.yaml

Deploying the website Fig 4.3
Access the website through the cluster’s IP address to verify its functionality.
kubectl get deplyoments
This command will show you the status of your deployment. Ensure that the desired number of replicas is running and available.
kubectl get services
Once you have the external IP address, you can access your website using a web browser. Simply enter the external IP address in the address bar of your browser.
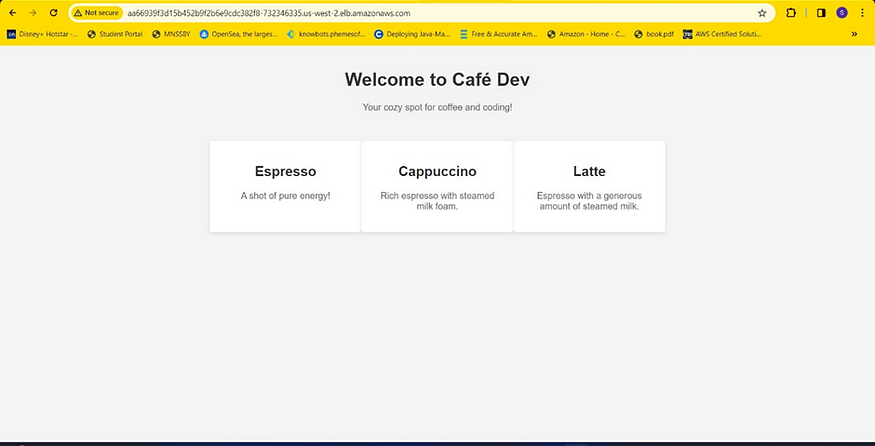
Website is up and running Fig 4.4
Successfully Deployed 😊